How to Format Your Digital Artwork for Printing: A Step-by-Step Guide
- Posted on
- By Jennifer Boe and Vaughn Sanchez
- 0
As a digital artist, there’s nothing quite like seeing your work come to life in a tangible, printed form. Whether you’re printing for a gallery show, a client, or your own personal portfolio, ensuring your digital artwork is properly formatted for printing is crucial for achieving high-quality results. In this post, we’ll walk you through the best way to format your digital files to get the most out of your prints.
1. Work at the Right Resolution
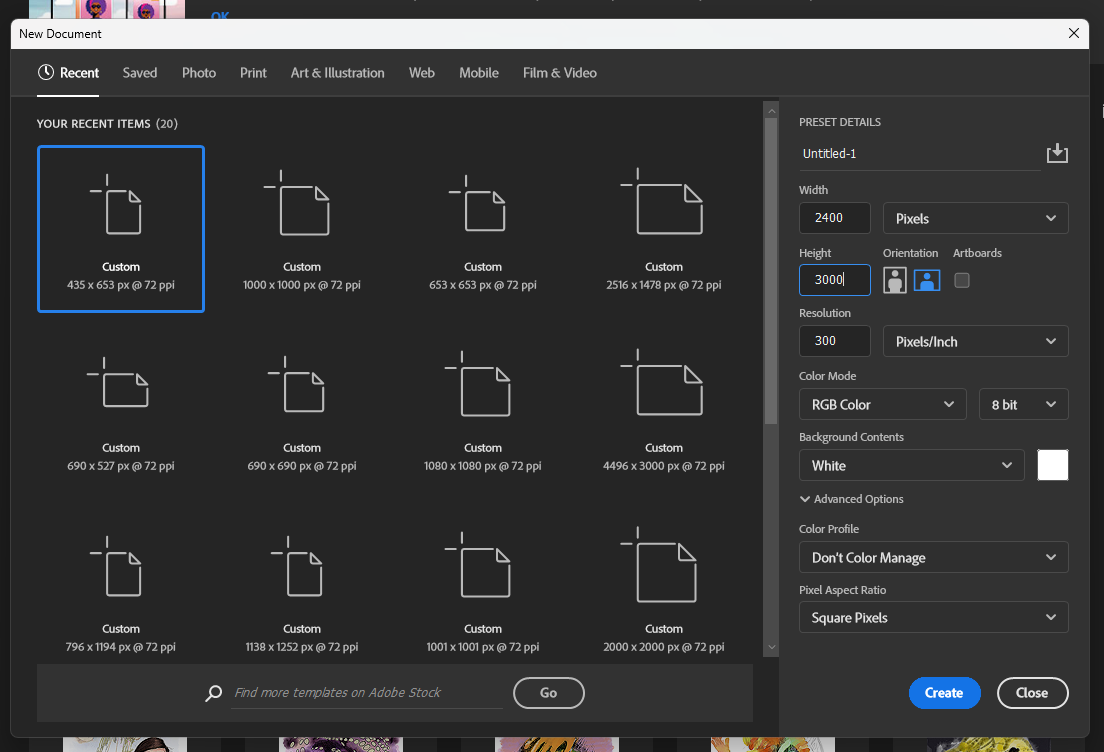
When creating digital artwork, working at the correct resolution from the start is essential for high-quality prints. The industry standard for printing is 300 DPI (dots per inch). This ensures that your printed image will be sharp and clear. If your resolution is too low, your artwork may appear pixelated or blurry when printed. Here’s a quick guide:
Print size vs. Resolution: Always set your canvas to the size you plan to print at 300 DPI. For example, if you want to print an 8x10” piece, set your canvas to 2400x3000 pixels (8 x 300 = 2400, 10 x 300 = 3000).
2. Choose the Right Color Mode
Most digital screens display in RGB (Red, Green, Blue), but printers use CMYK (Cyan, Magenta, Yellow, Black) color mode. When preparing your file for print, converting your artwork to CMYK is important to ensure the colors print accurately. Keep in mind that some colors that look vibrant on screen may appear different when printed.
Tip: After converting to CMYK, you might need to make minor adjustments to maintain the vibrancy of your artwork.

3. Use the Correct File Format
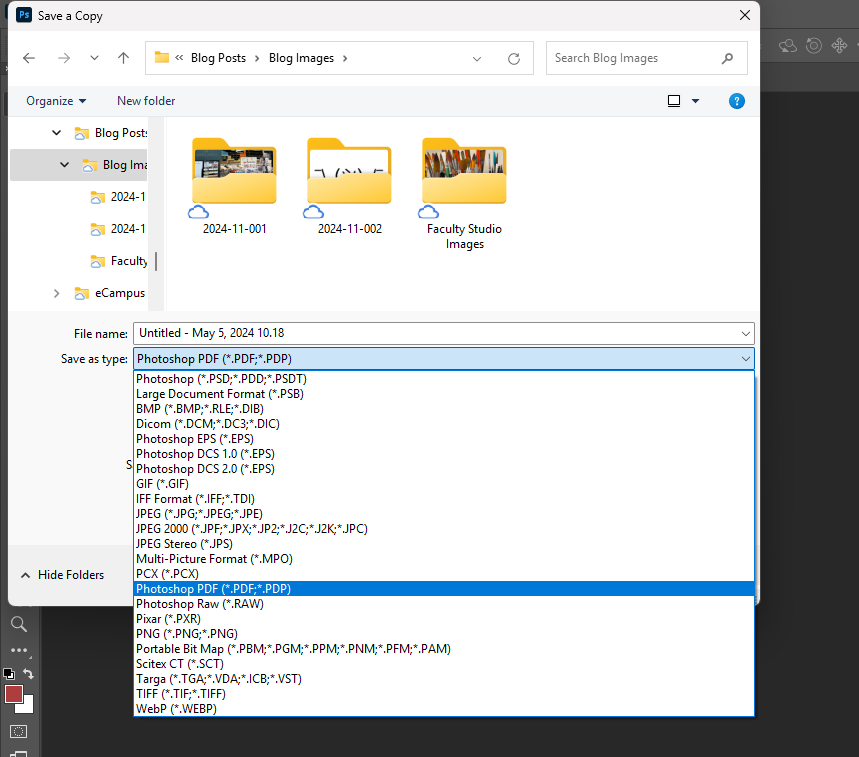
Choosing the right file format is crucial for preserving the quality of your digital artwork. For printing, you should always use a high-quality, lossless format. At the Print Center, we ask that you only send us PDF files. PDF is great for both small and large prints, and many printers prefer this format as it preserves vector elements and fonts.
Always avoid formats like GIF, JPG or PNG for print, as they are better suited for web use and don’t maintain the necessary quality for printing.
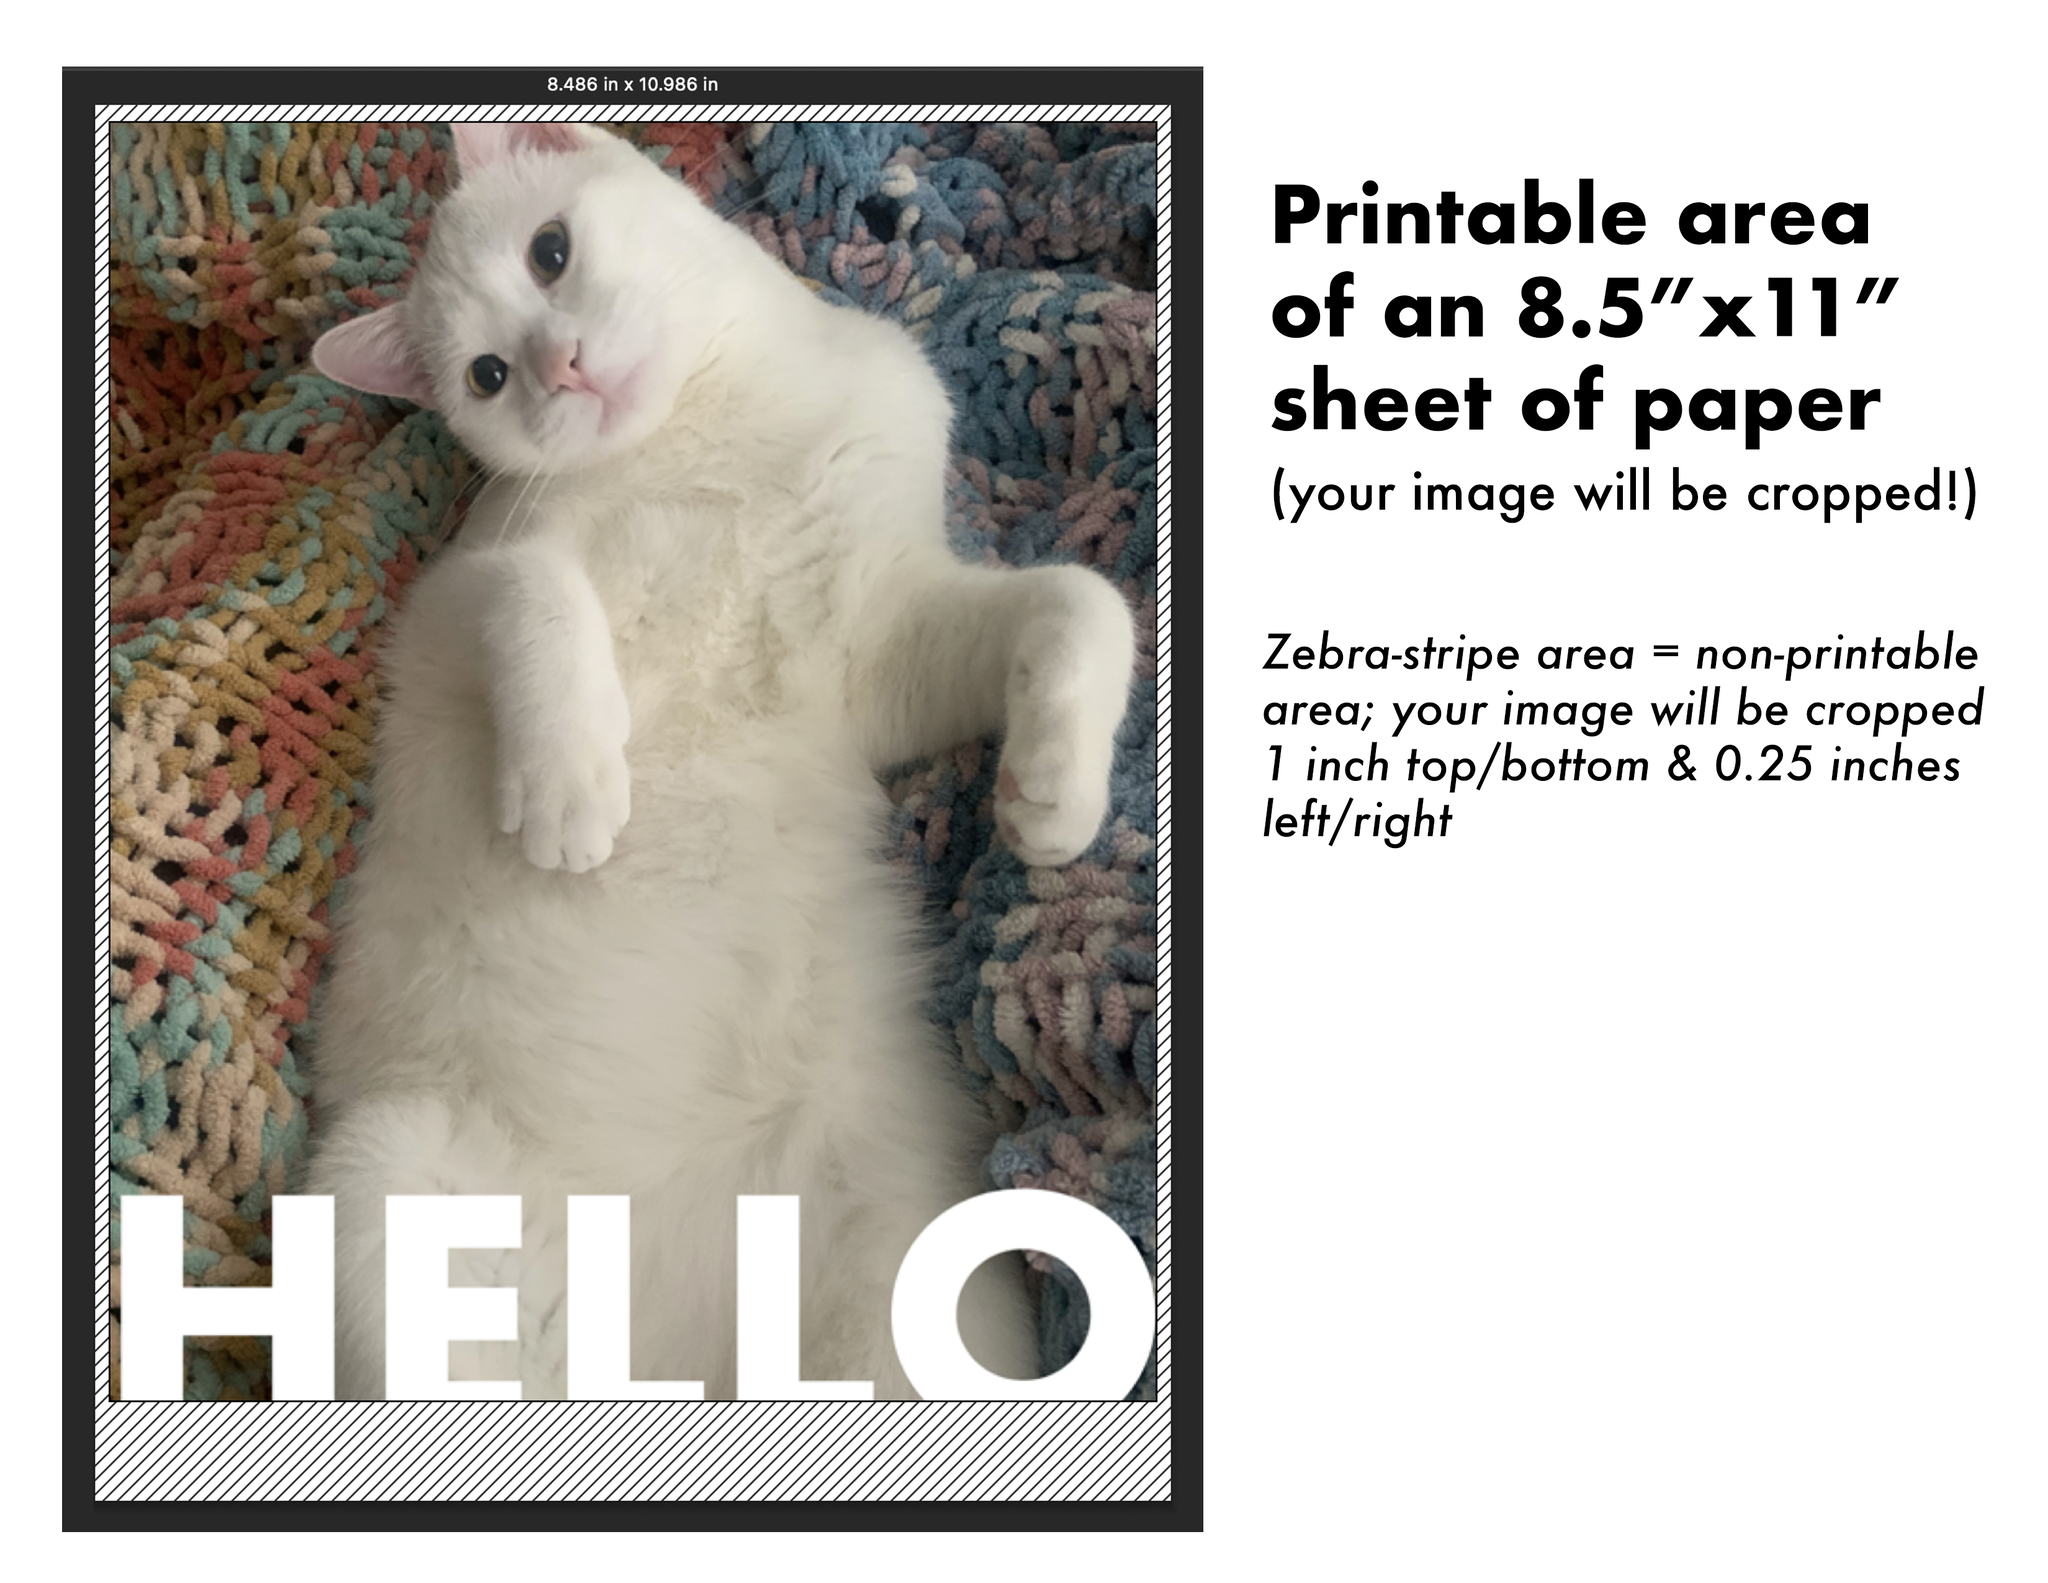
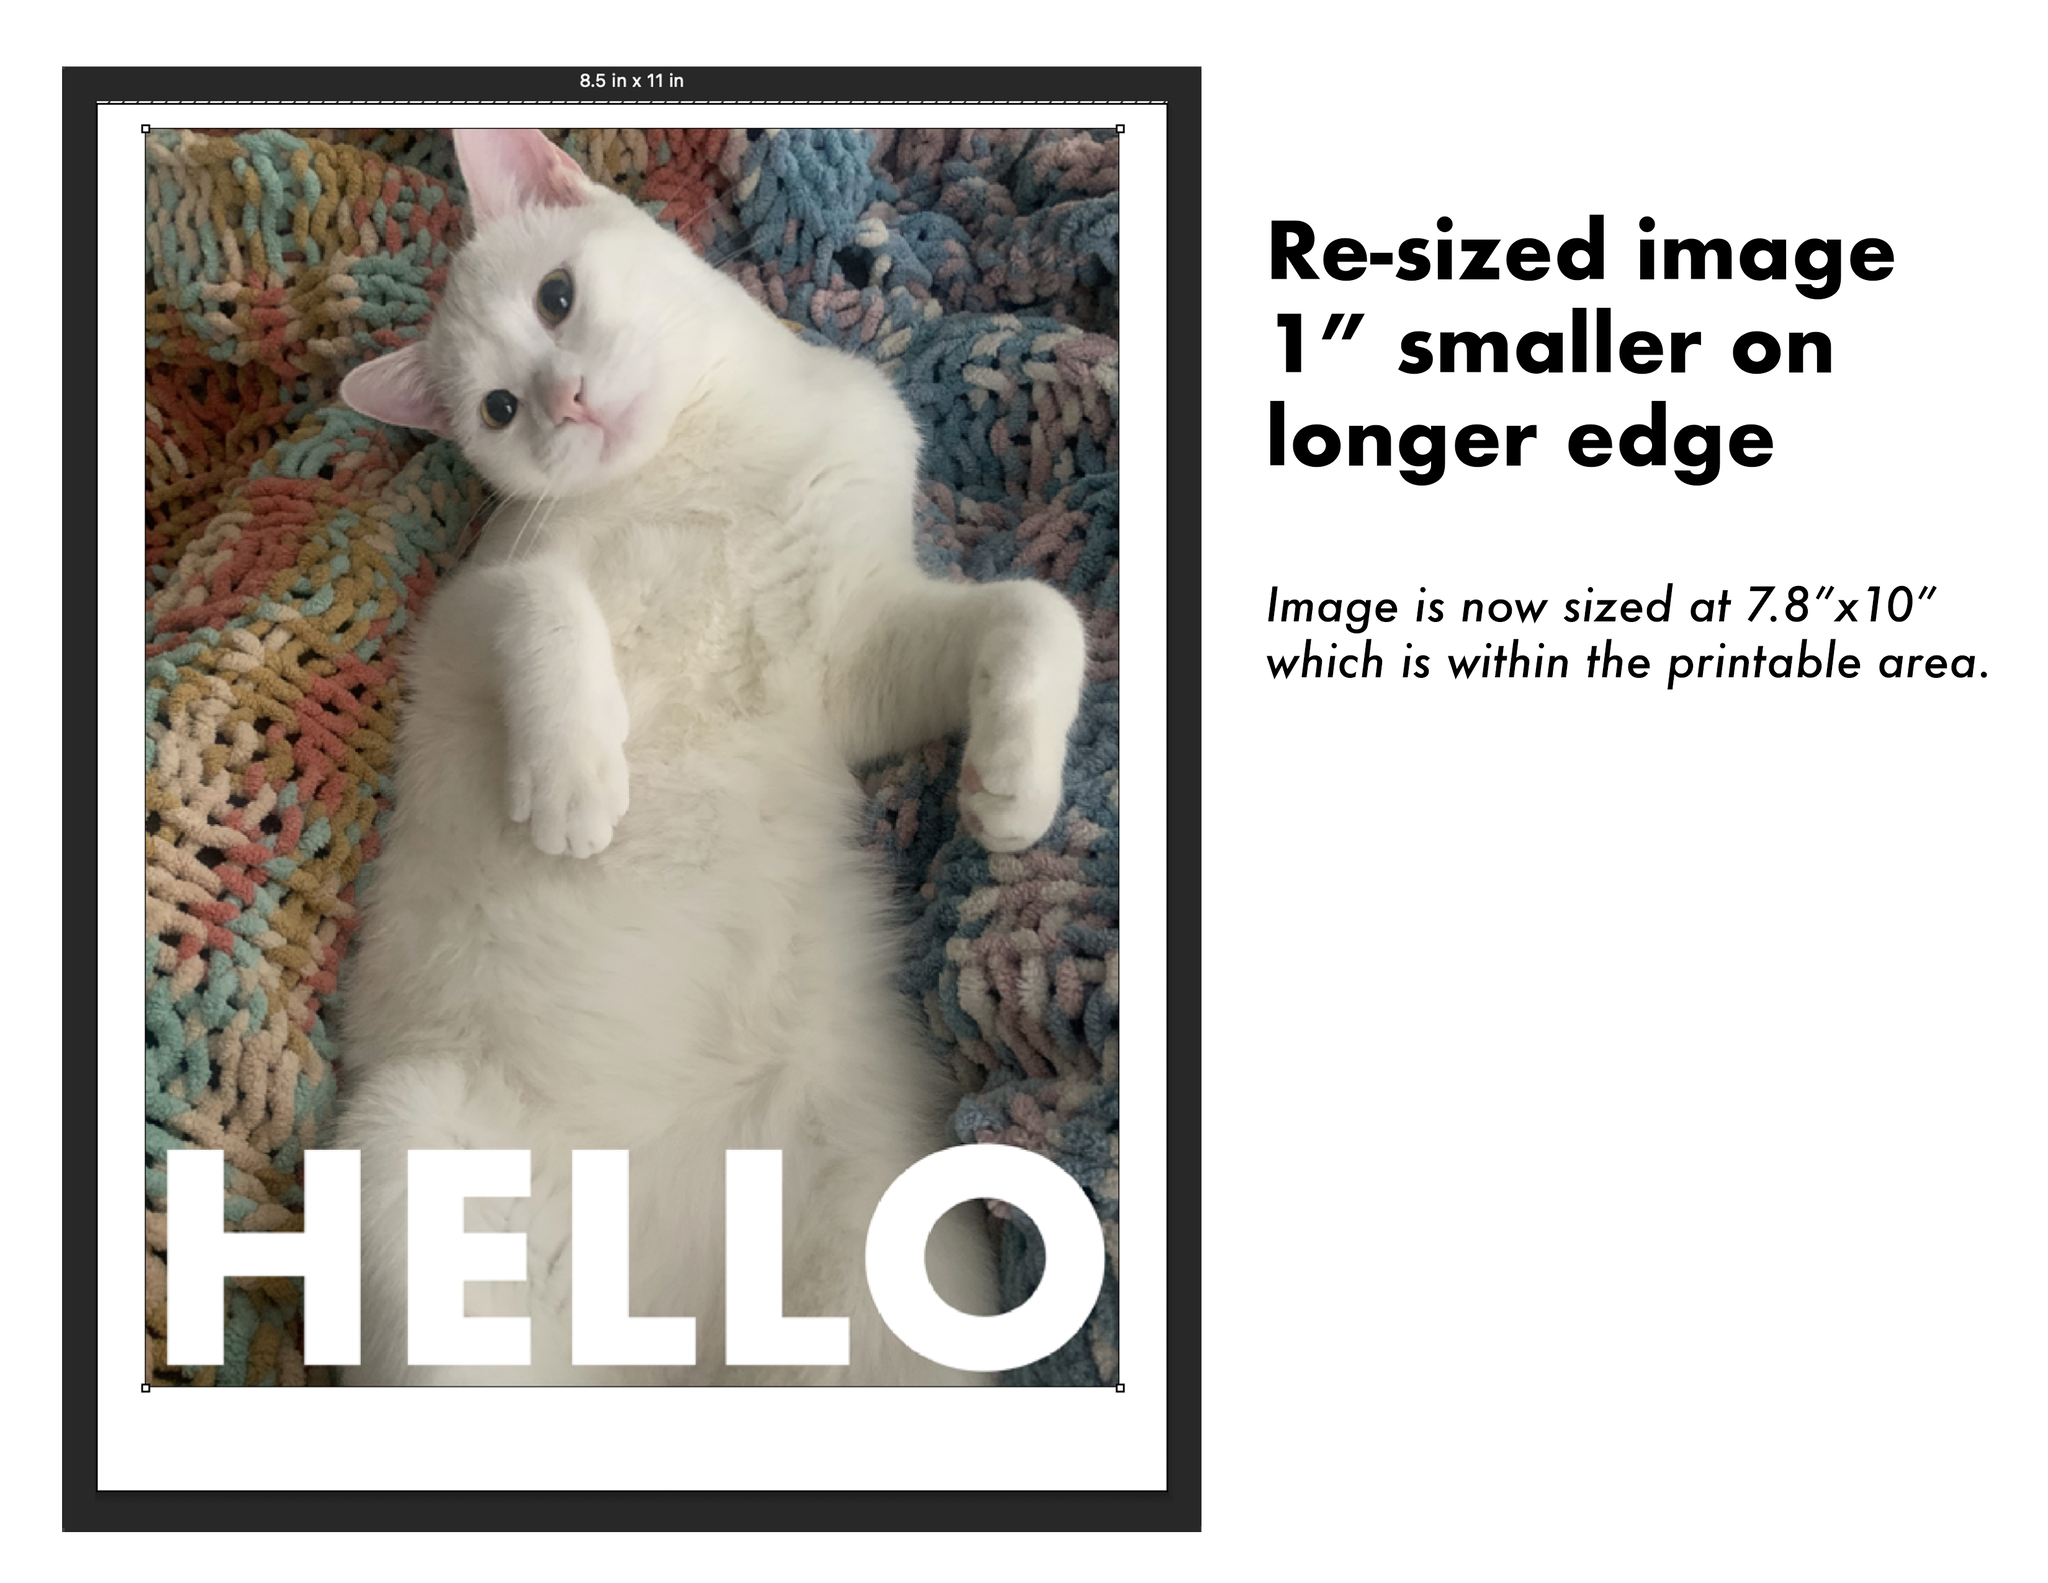
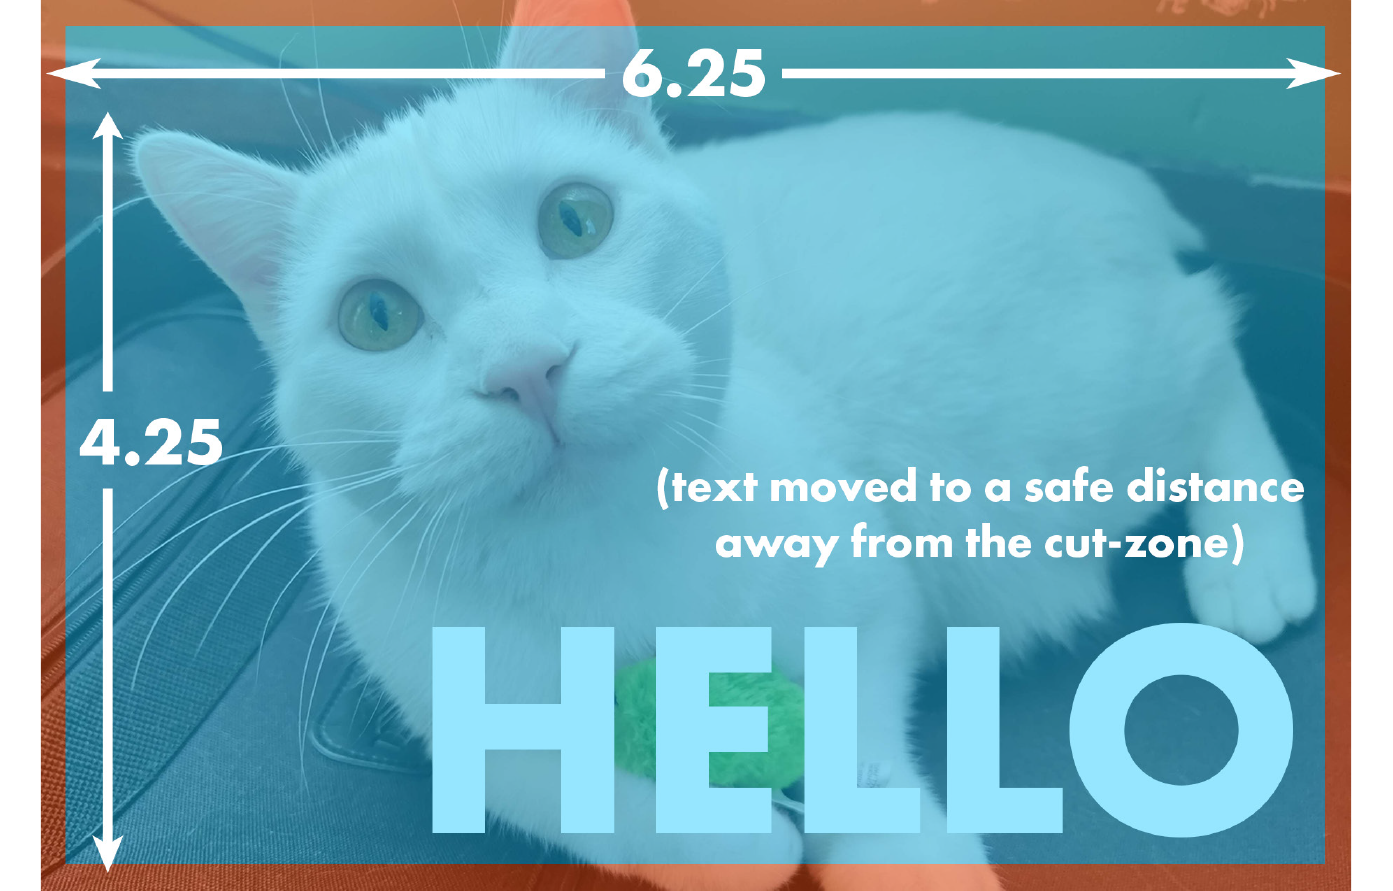
4. Understand Margins for Cut-Sheet Paper
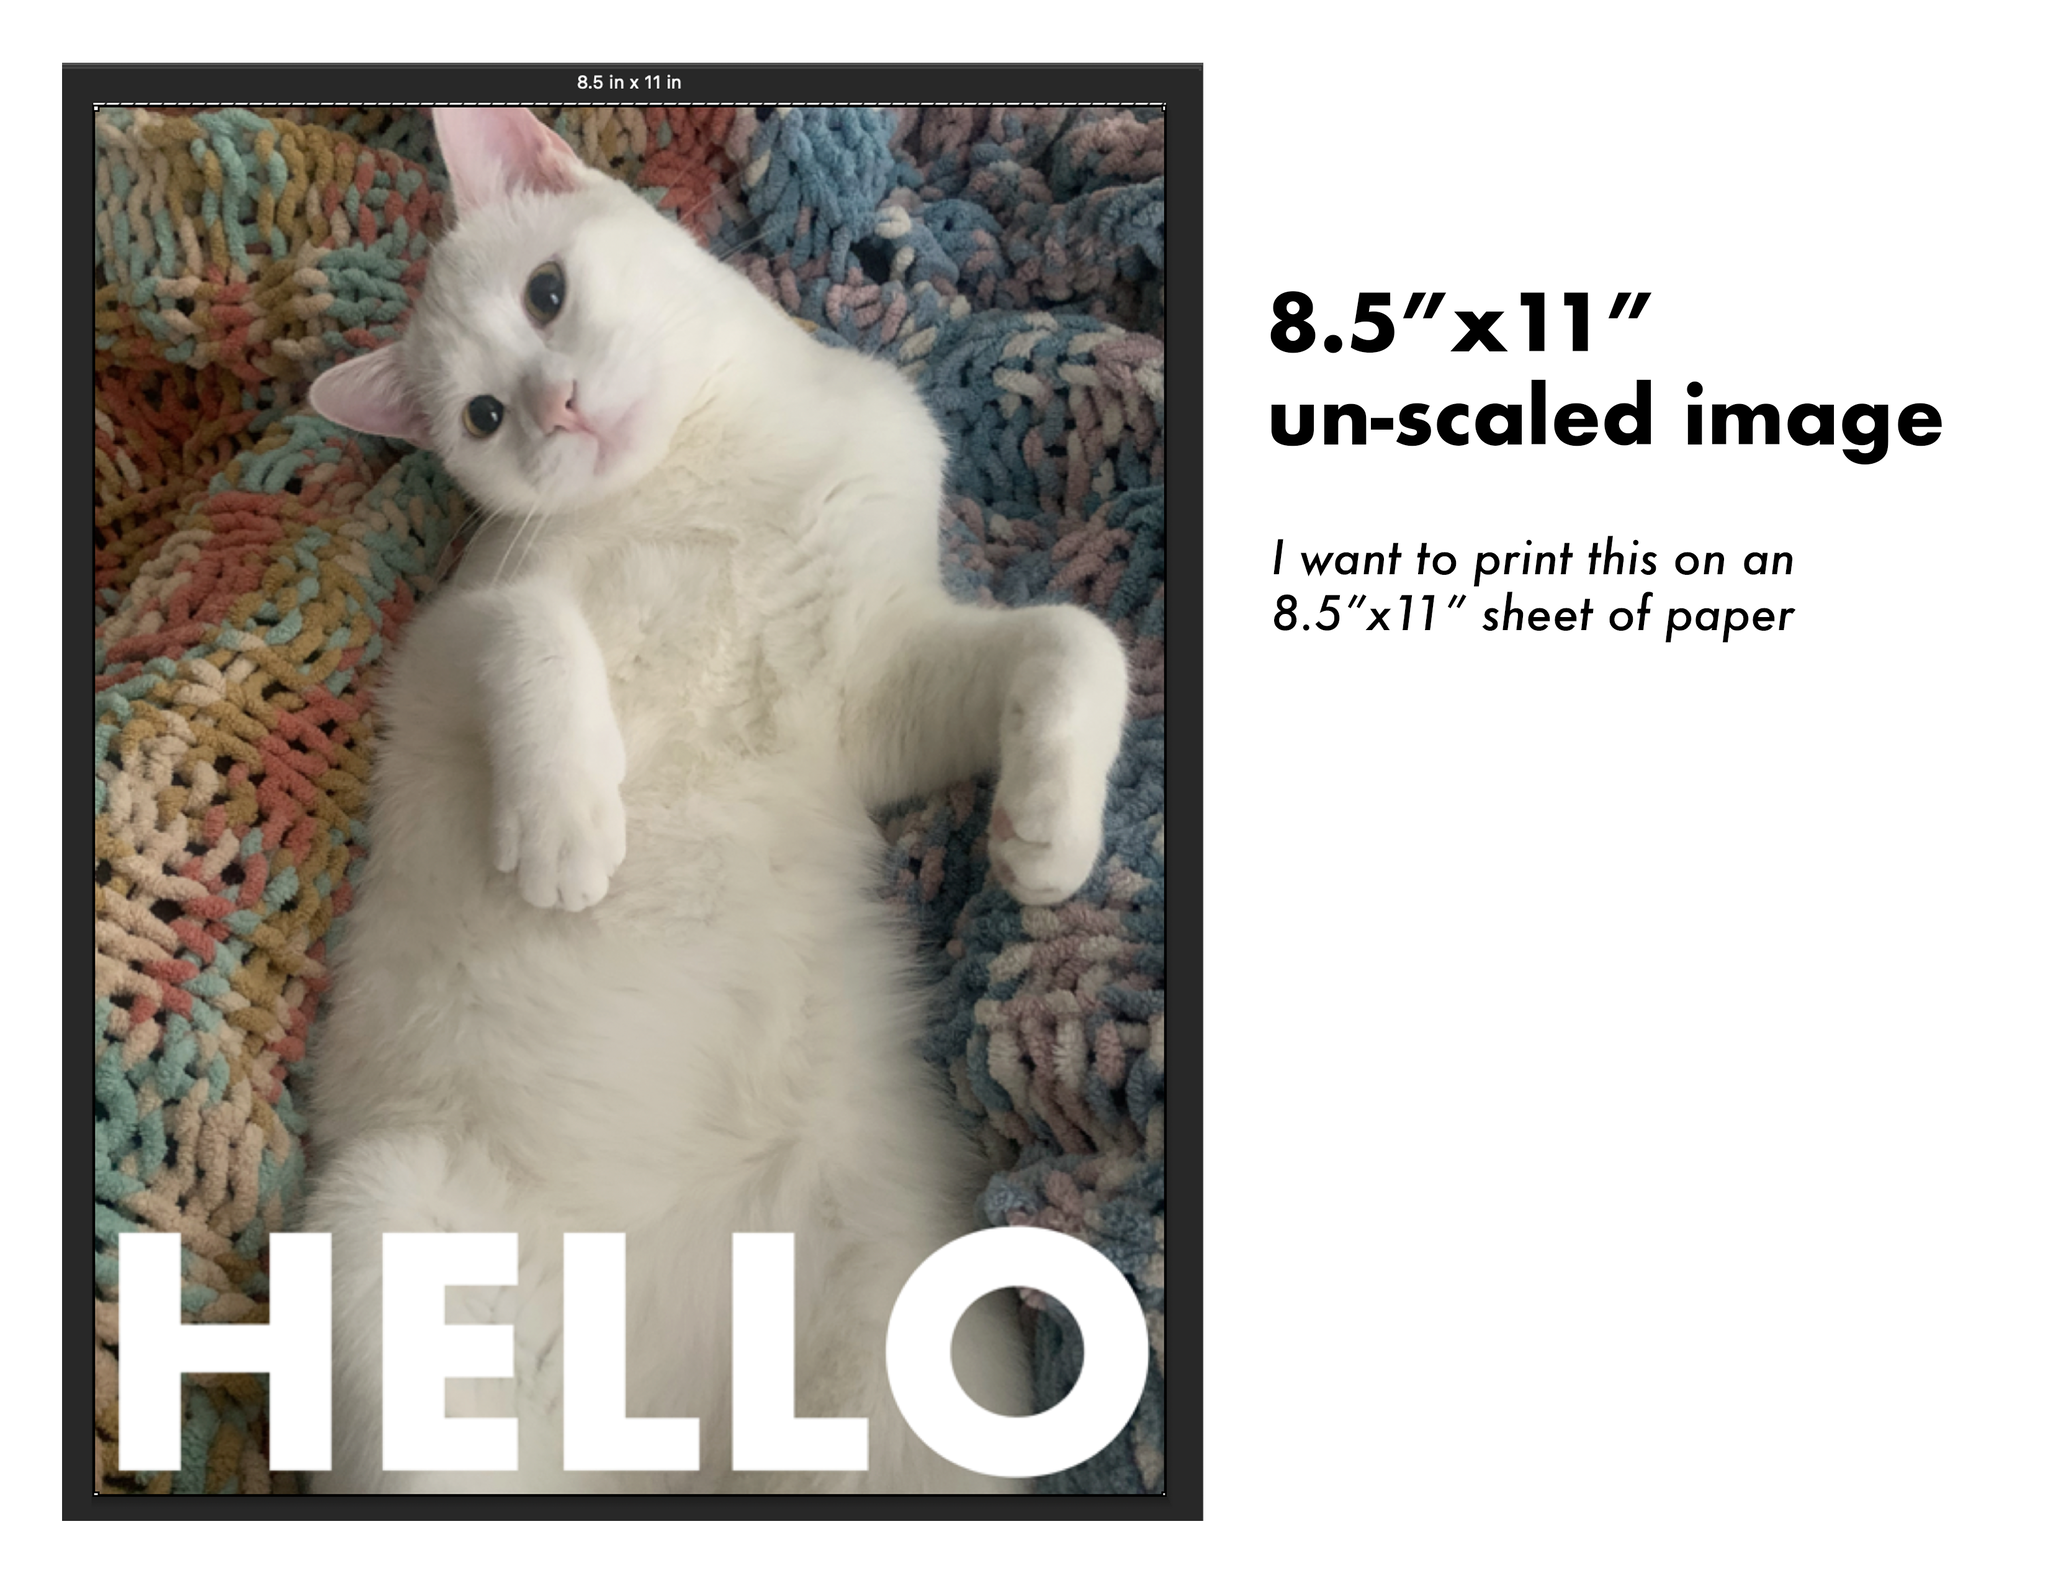
Margins are crucial when printing on cut-sheet paper, as most printers require a 0.125 to 0.25-inch minimum dead margin, an area on the printed page where ink cannot be applied. This is due to the rollers that feed the paper through the machine—printing too close to the edge can cause smudging or paper jams. To avoid important text or design elements being trimmed, keep them within this safe margin.
The takeaway here is that the maximum sized image that can be printed on an 8.5”x11” sheet of paper is 8.25”x10”, or for an 11”x17” sheet of paper, 10.75”x16”. If full-bleed printing (where the image extends to the edges) is necessary, one workaround is to print on a larger sheet and trim it down to the final size.
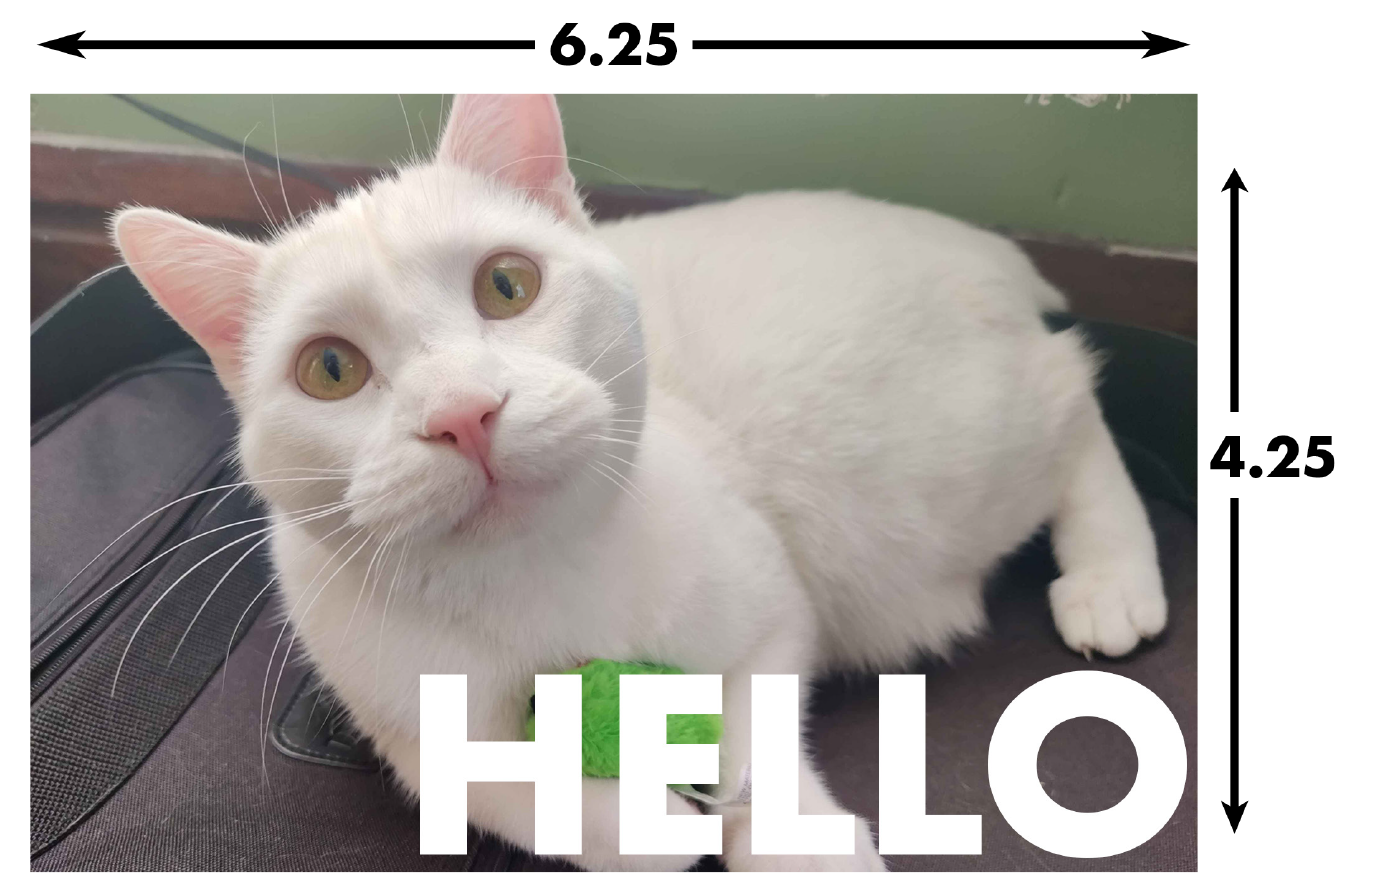
5. Add Bleed and Crop Marks
If your artwork extends to the edge of the print, you’ll need to account for bleed. Bleed is the extra space around the edges of your artwork that gets trimmed off during printing. Adding a bleed (typically around 0.125 to 0.25 inches) ensures that no white edges appear after cutting. Make sure to extend your artwork slightly beyond the final cut size.
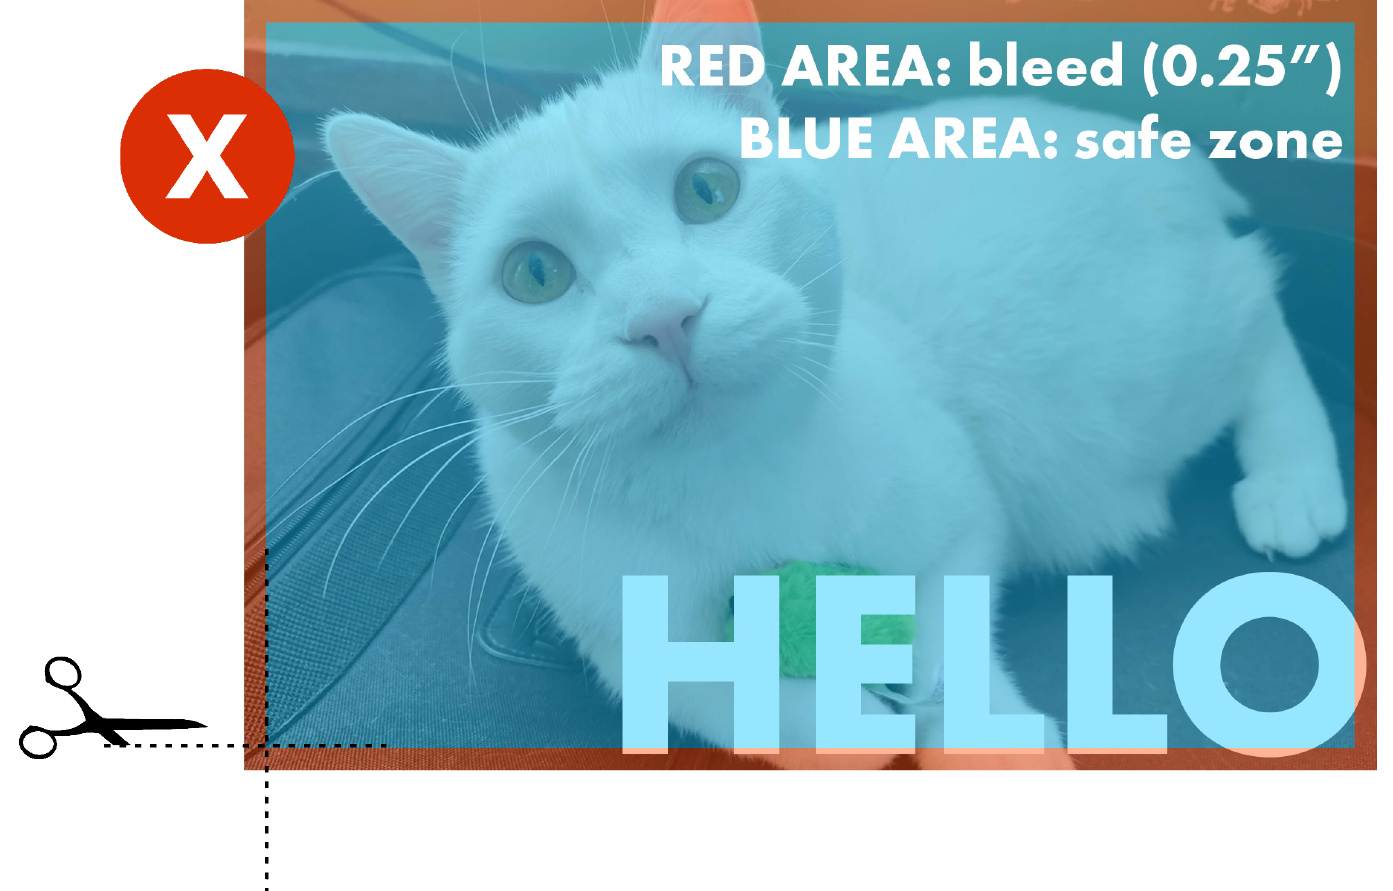
Additionally, you may need to add crop marks to your file, which show the printer where to trim the paper.
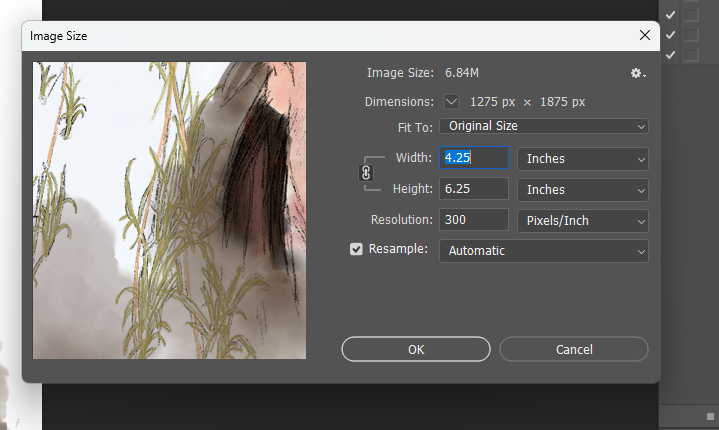
6. Check the Dimensions
Before sending your artwork to print, double-check that the dimensions of your file match the size you intend to print. It’s easy to overlook this step, and even a small discrepancy can lead to distorted or improperly cropped prints.
Tip: If your artwork is being printed at a much larger scale than you created it, consider creating a vector file (in programs like Adobe Illustrator), which can scale infinitely without losing quality.
7. Embed Fonts or Outline Text
If your artwork includes text, make sure to either embed the fonts or convert your text to outlines. This ensures that the fonts will print exactly as you designed them, even if the Print Center doesn’t have your specific font installed. In Adobe Illustrator or InDesign, you can easily outline text by selecting it, then navigating to Type > Create Outlines.
8. Proof Your Artwork
Before finalizing your file for print, it’s always a good idea to do a soft proof or even order a test print. Most professional printing services offer proofing options to check how your artwork will look when printed. If you notice any color shifts or unexpected results, you can make adjustments before committing to a full run of prints.
9. Choose the Right Paper
Once your file is print-ready, don’t forget that the paper choice can dramatically affect how your artwork looks in print. Matte, glossy, textured, or fine art papers all interact differently with ink, so consider how you want the final product to feel and look. Don’t hesitate to come into the Print Center to view our paper samples to see what best suits your work.
Conclusion
Properly formatting your digital artwork for printing ensures your creative vision translates perfectly from screen to paper. By working at the right resolution, using the correct color mode, and carefully selecting your file format, you can avoid common pitfalls and produce high-quality prints that you’ll be proud to display. Whether you’re printing fine art pieces, posters, or professional portfolios, following these steps will help you achieve the best results every time.
Ready to print your digital artwork? Visit The KCAI Underground Print Center to submit your files and explore our selection of premium art papers and printing materials. Feel free to reach out to us for tips and advice on how to get the most from your print projects!
Comments
Be the first to comment...